

How To Use Swift Open Camera
Swift — Creating a Custom View From a XIB (Updated for Swift 5)
How to create a custom view from a XIB using Swift

Creating a custom view is ofttimes easiest in a XIB file, where you can visualize, layout, and edit the look and feel of what you're trying to build.
Getting these views from the XIB to your awarding'southward screen is more complicated than it seems, given how mutual this pattern is in iOS development.
The post-obit is a very simple tutorial that illustrates the whole process.
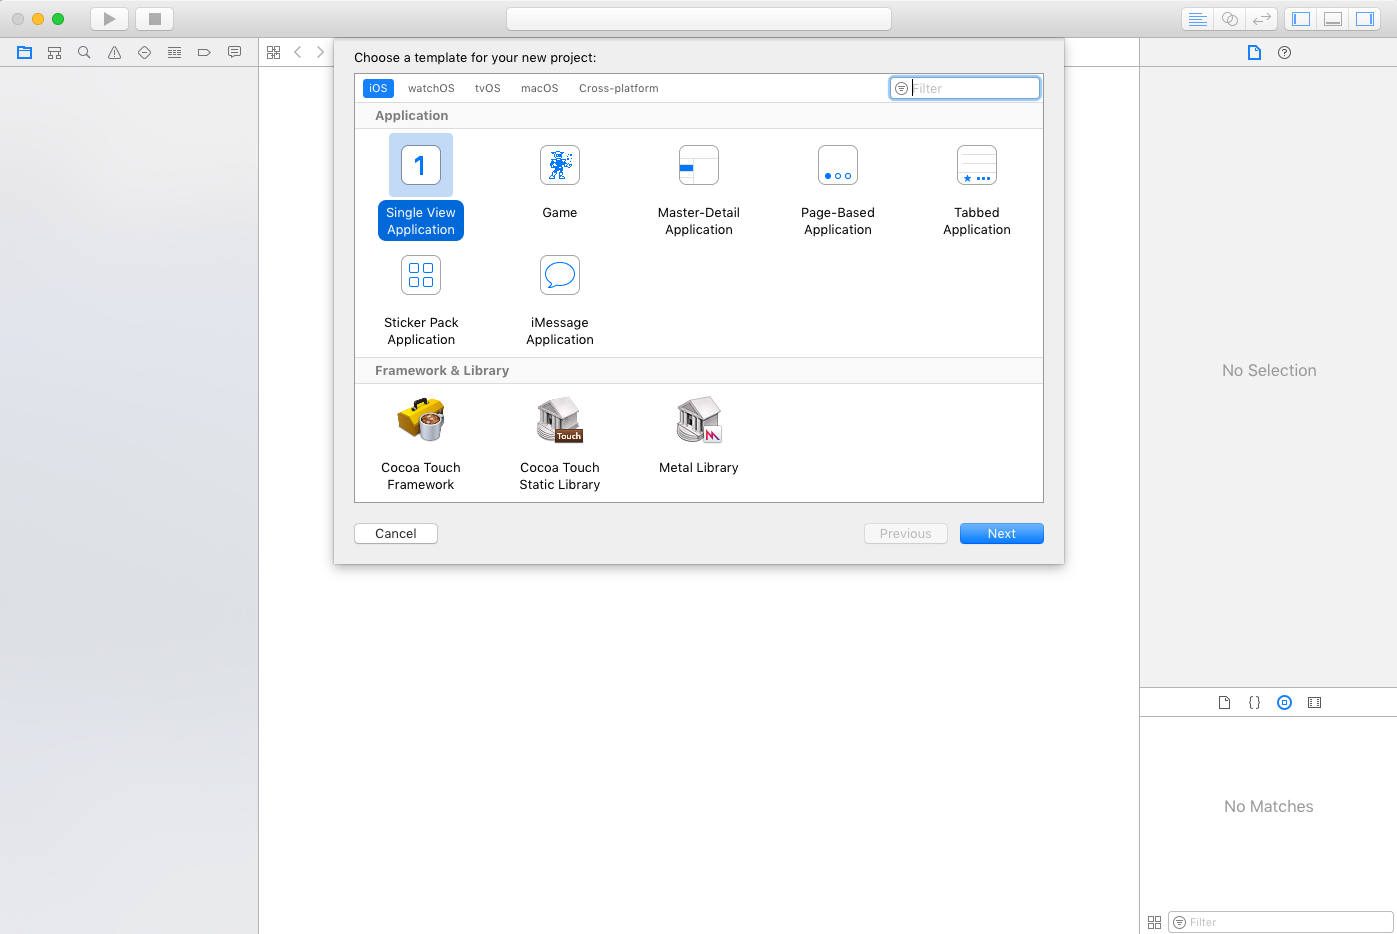
Create a New Single View Application Project
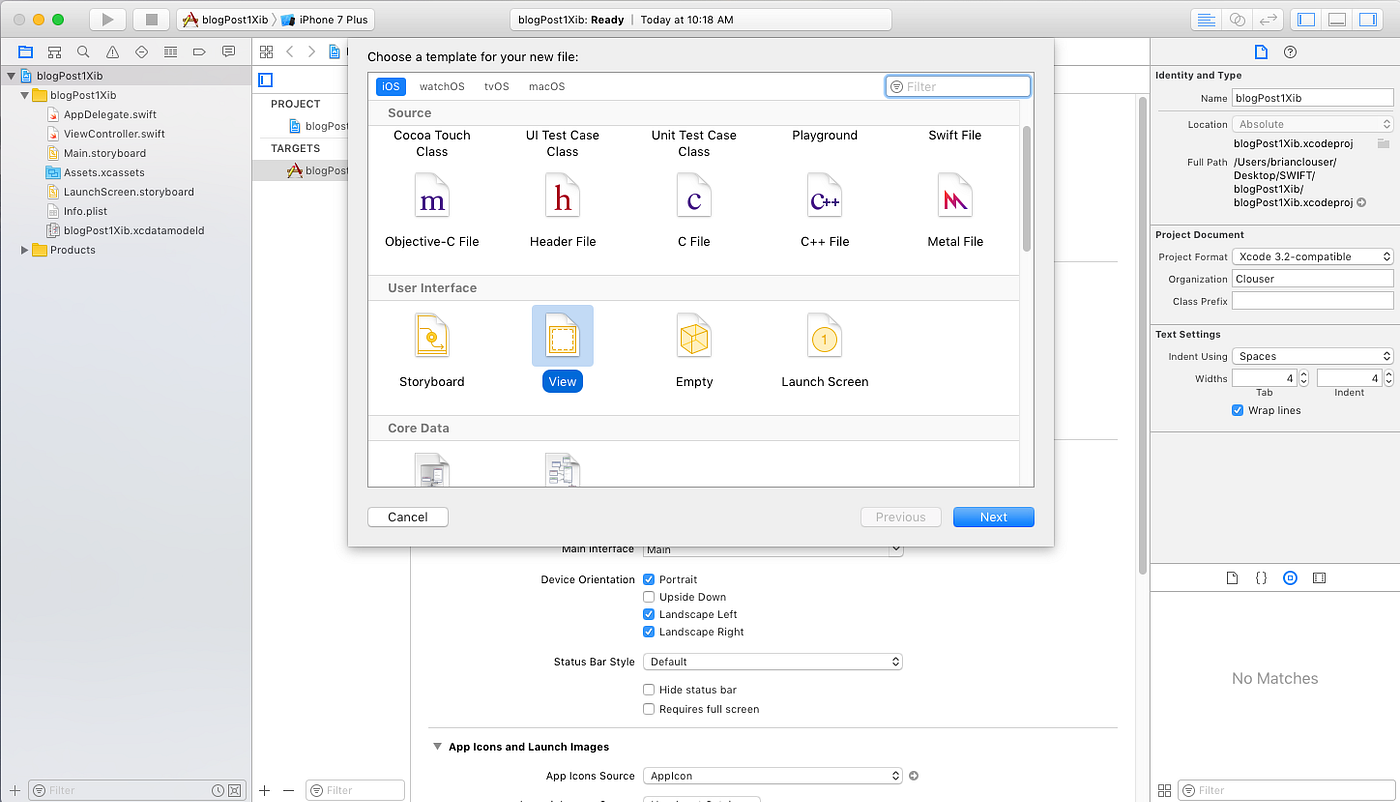
2. Create a XIB File
Right click on the portion of the screen where your projection's files are (view controller, storyboard, etc), and choose new file.
Xcode will prompt you for which file blazon you'd like to create. Cull the View option nether the user interface menu. In the post-obit pop up you'll exist prompted to name your XIB— we called ours TestView.
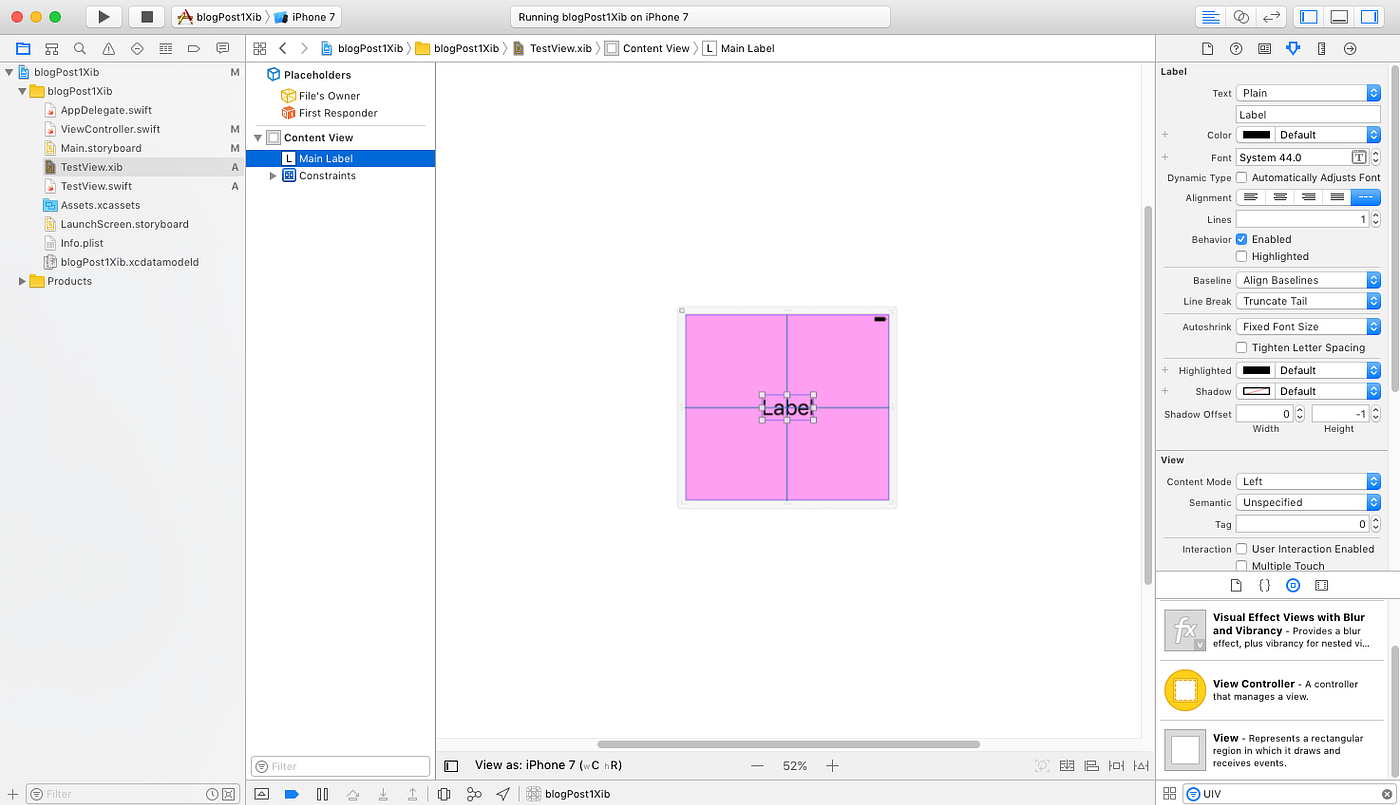
3. Design Your View in Interface Builder
We inserted a UILabel, and constrained information technology to the centre of the screen. You'll probably want something a bit more than involved.
We also made our background color pink, and so it's easier to see when nosotros eventually run our app. You may want to brand other pattern decisions.
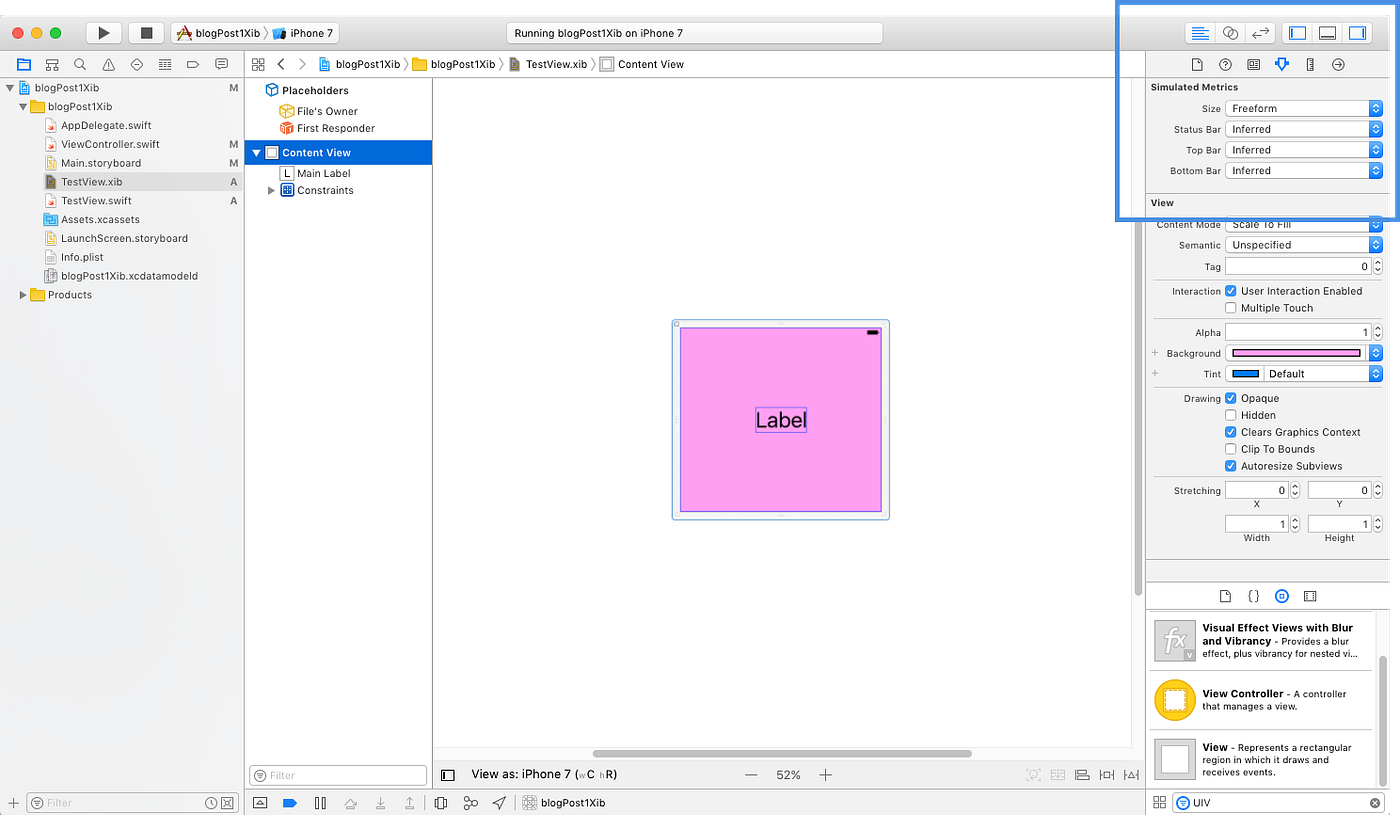
If yous want to change the shape of your XIB, click on the attributes inspector in the upper correct paw corner, and modify size to freeform.
This volition let you click on the view and change the shape as you encounter fit. The shape you choose doesn't actually matter, as you'll see by the end of this tutorial, merely yous may desire to make the XIB more or less the same shape equally you envision it in your application, to help with laying out your elements.
4. Create a Custom UIView File
Now that we have our XIB, we need to create the custom UIView class that will control information technology.
Right click where all your files are, and choose new file (again), just this fourth dimension select Cocoa Affect Class under the Source carte.
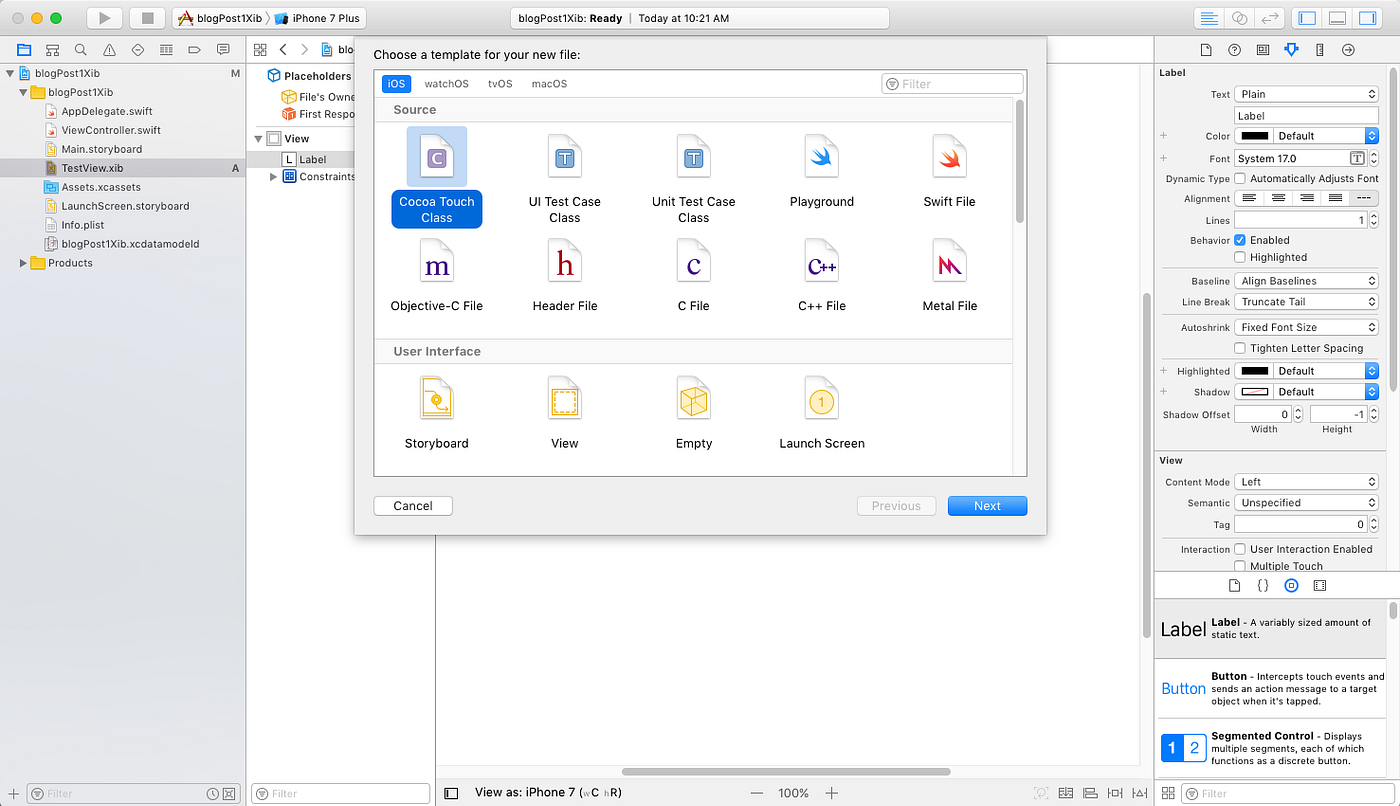
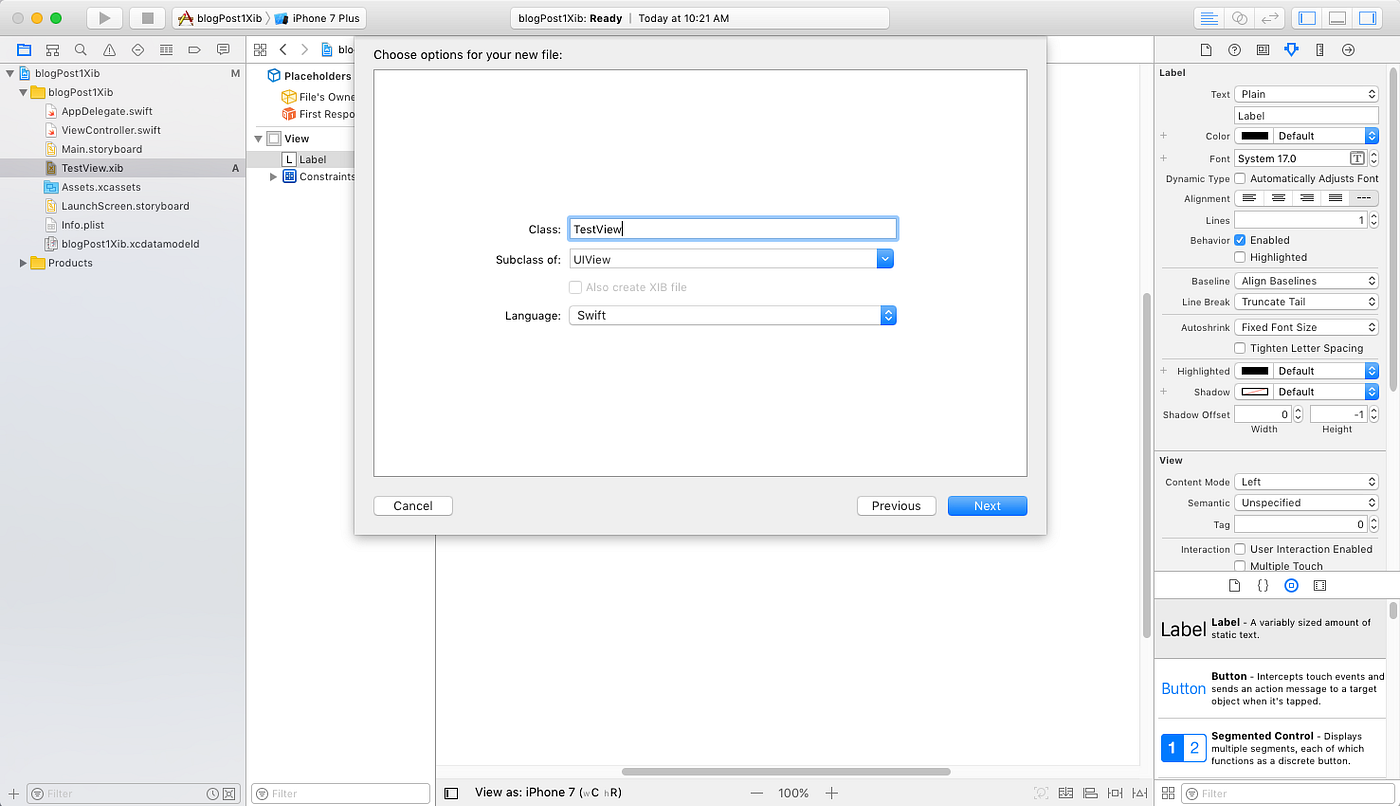
When y'all're prompted to proper noun the new file, make sure you lot make it a subclass of UIView. Xcode may default to another Cocoa class.
In this tutorial, we named this file TestView too, as it'due south going to be associated with the TestView XIB we just created.
5. Override Both UIView Initializers
This is where things get a little tricky. UIViews can exist created in two ways — in the interface builder (i.east. a storyboard or XIB), or directly in the code.
At that place's an initializer for each of these creation methods, and nosotros need to override both of them with our own custom initializer.
When you create your custom UIView, you lot're going to come across an empty file with some comments Apple tree added, hinting at what we're going to have to do.
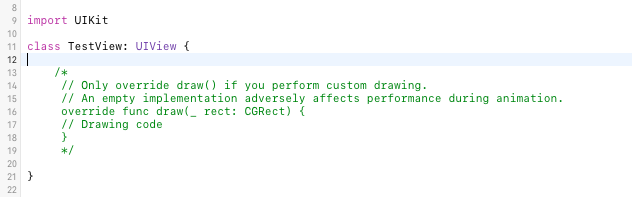
Delete the comments, and type the following:
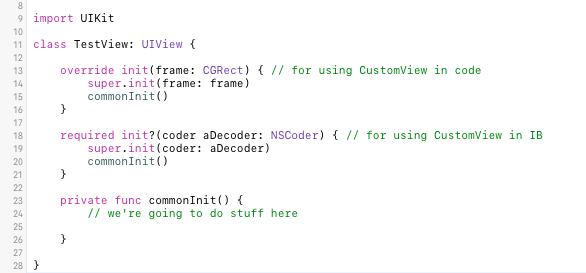
Nosotros simply overrode both UIView initializers, and called our initializer named commonInit (y'all can call information technology whatever you want). Unfortunately, our initializer doesn't do anything yet. Nosotros'll get there in a sec.
6. Add UIView As XIB File's Owner
Nosotros're virtually there. We now have a XIB file and a custom UIView. Nosotros just have to connect the two.
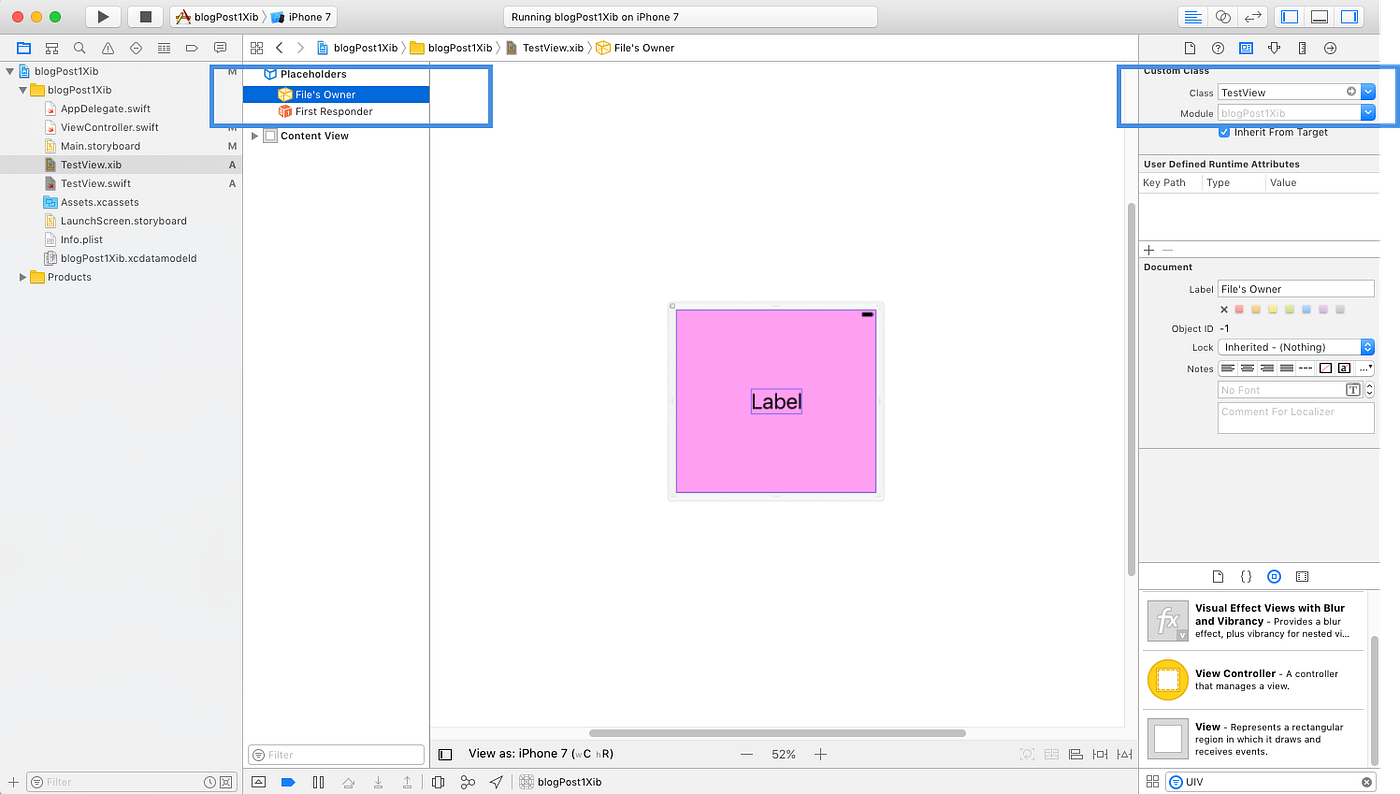
Click dorsum into your XIB file, and click on the File'south Owner choice, under the placeholder's department. So on the right manus side of the screen, in the Identity Inspector, enter the proper noun of the UIView file (TestView) every bit the Form. This should autocomplete — if it doesn't, you've probably done something incorrectly.
7. Add Entire View as an IB Outlet in UIView File
Now that you've added your custom UIView as the file's owner, you lot should exist able to tap the assistant editor button in the upper right, and load the view next with your XIB.
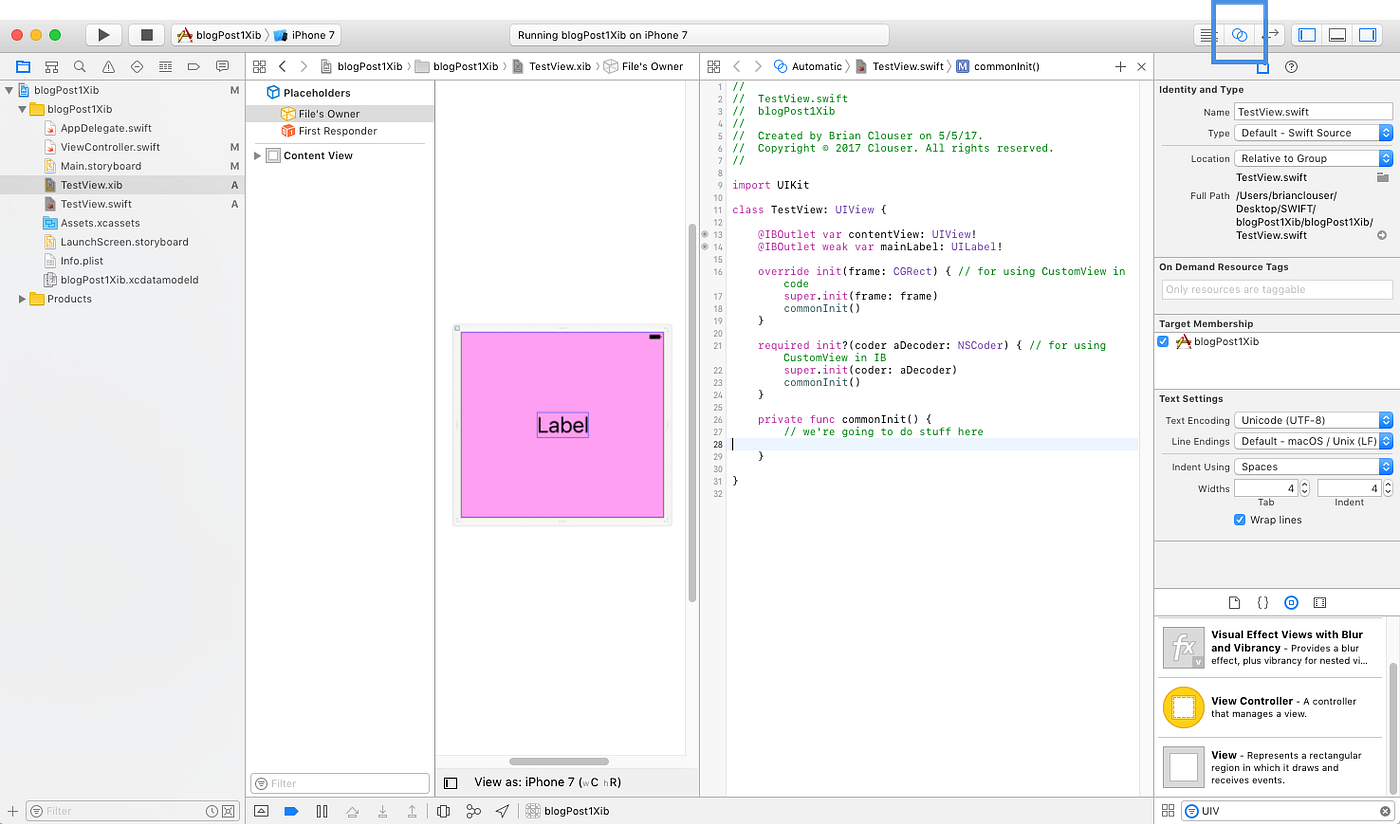
Ctrl-drag the entire view in, as an outlet to your view file. You tin name it whatsoever you want, but it's a proficient habit to proper name it contentView.
You can besides elevate in whatever other elements as IBOutlets. In this case, all we have is our label, and then nosotros dragged that in likewise. Our view file now looks similar this:

8. Load XIB in Mutual Initializer
Blazon the following four lines of lawmaking into your commonInit:

In the first line, we loaded the XIB by name from retention. If you named your XIB file something unlike, you'll need to change the TestView string in the loadNibNamed function.
In the next line, we added the content view that we dragged in as an outlet, every bit a subview of the view we created.
In the next two lines, we positioned the content view to take up the unabridged view's appearance. There are a myriad of ways to accomplish this, and this probably isn't the best pattern, but information technology's quick and easy, and only two lines of lawmaking.
9. Use Your View
We're washed! Now nosotros've got a custom view, made from a XIB file, that we can use throughout our projection. Let'due south see how that looks.
Click on your storyboard file, and drag in a UIView. Click on the identity inspector in the upper right, and change the course to TestView (or whatever you lot named your UIView).

You lot can identify it anywhere y'all want on the screen. We constrained it to the center of the screen, and had information technology take up l% of the width, and 50% of the pinnacle — just for demonstration purposes.
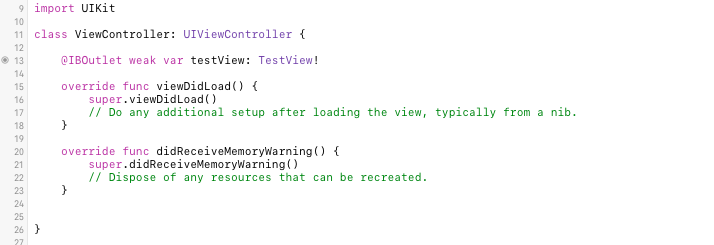
Open up your assistant editor again. This time it should open to your view controller file. Drag the TestView in as an IBOutlet. Your view controller should at present look like this:
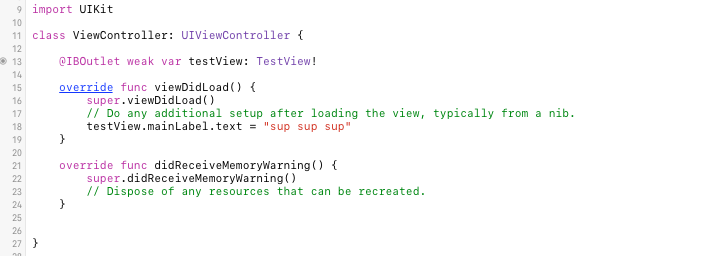
One final thing — think that label on our view? Let's alter the text. I'm going to use my former boss's favorite greeting:
That'southward it. Let's run the project!
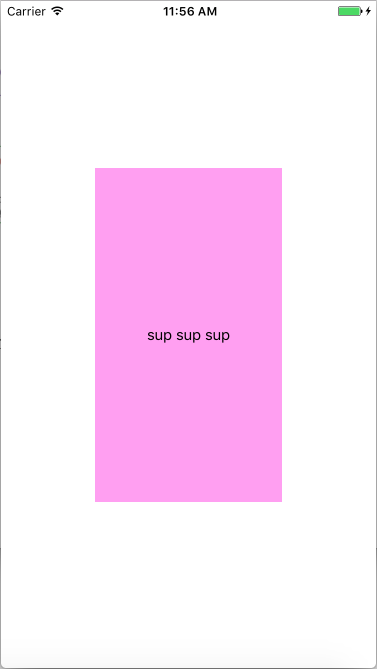
There yous have it — an app that simulates life in an NBA front end office.
Call up when yous set up the XIB, and I said the size doesn't really affair? This is why. The XIB is going to take up the size of this view — however big or pocket-size, or whatever shape you lot make it in your storyboard (or code). All that really matters is how you've constrained all of the elements within your XIB.
You can use this view throughout your app. If you'd similar to go back and redesign how information technology looks, you can just modify it in your XIB file, and all those changes will flow throughout the app.
Questions or comments? Let me know! For anyone interested in investing, please cheque out Stock Genius, a brand new stock free tracking app I built featuring real time prices directly from the commutation (and many custom views built from xibs!).

Source: https://betterprogramming.pub/swift-3-creating-a-custom-view-from-a-xib-ecdfe5b3a960
Posted by: lefebvreyorshoweaged50.blogspot.com
0 Response to "How To Use Swift Open Camera"
Post a Comment